How to Install Cloudron on Ubuntu 18.04 LTS⚓
Get Started With Cloudron⚓
Running web apps is time consuming and error-prone. Keeping your system up-to-date and secure is a full-time job. Cloudron lets you focus on using the apps and not worry about system administration.
Cloudron is a single-click, turn-key application platform for the cloud. Their 60+ applications have been tested and approved to run trouble-free. It automates all the tasks from configuring databases and setting up DNS records to installing and managing certificates. Cloudron provides you with a centralized platform to manage users and their web apps from the comfort of your web browser. In this tutorial, we’ll show you how to install and configure Cloudron on your cloud server and how to deploy your first web app.
Install Cloudron⚓
Minimum Requirements⚓
Cloudron requires at least 1GB RAM, 20GB Disk space. Make sure the firewall does not block port 80 (http) and 443 (https). Cloudron does not support running on ARM, LXC or OpenVZ.
Cloudron provides a quick and easy installation method via a setup script. Run the following commands on a fresh Ubuntu Bionic 18.04 (x64) server:
The above command will check and update the server with the latest packages and then reboot. Once your server comes back up, login again via ssh and continue with the following commands:
Make the script executable with the following command.
Then install Cloudron by running the script.
If install fails try running the following command to restart the install:
apt -y install resolvconf;echo "nameserver 8.8.8.8" > /etc/resolvconf/resolv.conf.d/tail; resolvconf -u; ./cloudron-setup --provider generic
You will then see an output similar to the example below.
##############################################
         Cloudron Setup (latest)
##############################################

 Follow setup logs in a second terminal with:
 $ tail -f /var/log/cloudron-setup.log

 Join us at https://forum.cloudron.io for any questions.

=> Installing software-properties-common
=> Ensure required apt sources
=> Updating apt and installing script dependencies
=> Checking version
=> Downloading version 4.1.1 ...
=> Installing base dependencies and downloading docker images (this takes some time) ...
=> Installing version 4.1.1 (this takes some time) ...
=> Waiting for cloudron to be ready (this takes some time) .....

Visit https:// and accept the self-signed certificate to finish setup.

The server has to be rebooted to apply all the settings. Reboot now ? [Y/n]
Once the installation is complete, you will be prompted to restart the server. Select yes and press the enter key to reboot.
Rebooting the server will close your SSH connection, reconnect manually in a few seconds.
Once you log back into your cloud server, you will be greeted by a welcome message.
**********************************************************************

                        WELCOME TO CLOUDRON
                        -------------------

Visit https:// on your browser and accept the self-signed certificate to finish setup.

Cloudron overview - https://cloudron.io/documentation/
Cloudron setup - https://cloudron.io/documentation/installation/#setup

For help and more information, visit https://forum.cloudron.io

**********************************************************************
Installation, done! Continue below with configuring Cloudron.
Configuring Cloudron⚓
With Cloudron installed, next, you’ll need to configure the server. Open your server’s public IP on a web browser, accept the warning of an insecure website when prompted.
https://Your.Servercheap-server.ip
Once on the page, you will be presented with a setup page.
Below are links to Cloudron help pages about some of the DNS providers you might be using.
| Cloudflare | Gandi |
|---|---|
| GoDaddy | name.com |
| Namecheap | Route53 |
| Wildcard | Manual |
Once Cloudron has connected with your domain name registrar’s API and configured the necessary records, you’ll be forwarded to the administration account setup page.
In the next step, fill in your details to create an admin account, then press the Done button to confirm.
Once the account setup is complete, you’ll get logged into your Cloudron control panel. For the moment, there are no apps installed. Go to the App Store to find something to try out. But before that you need to create an account first. By signing up with Cloudron, the server will register itself and get a unique Cloudron ID.
Deploying Your First App⚓
With Cloudron, web apps can be installed quickly and easily straight from their App Store. It’s an app repository hosted by cloudron.io and provides app packages that can be installed on a Cloudron.
Pick an app to test your installation.
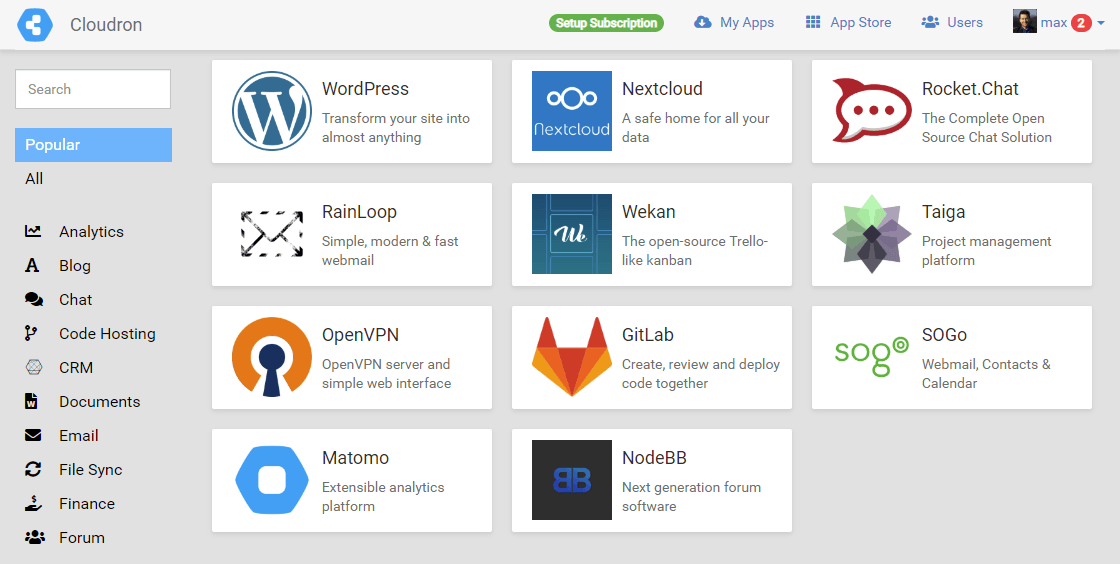
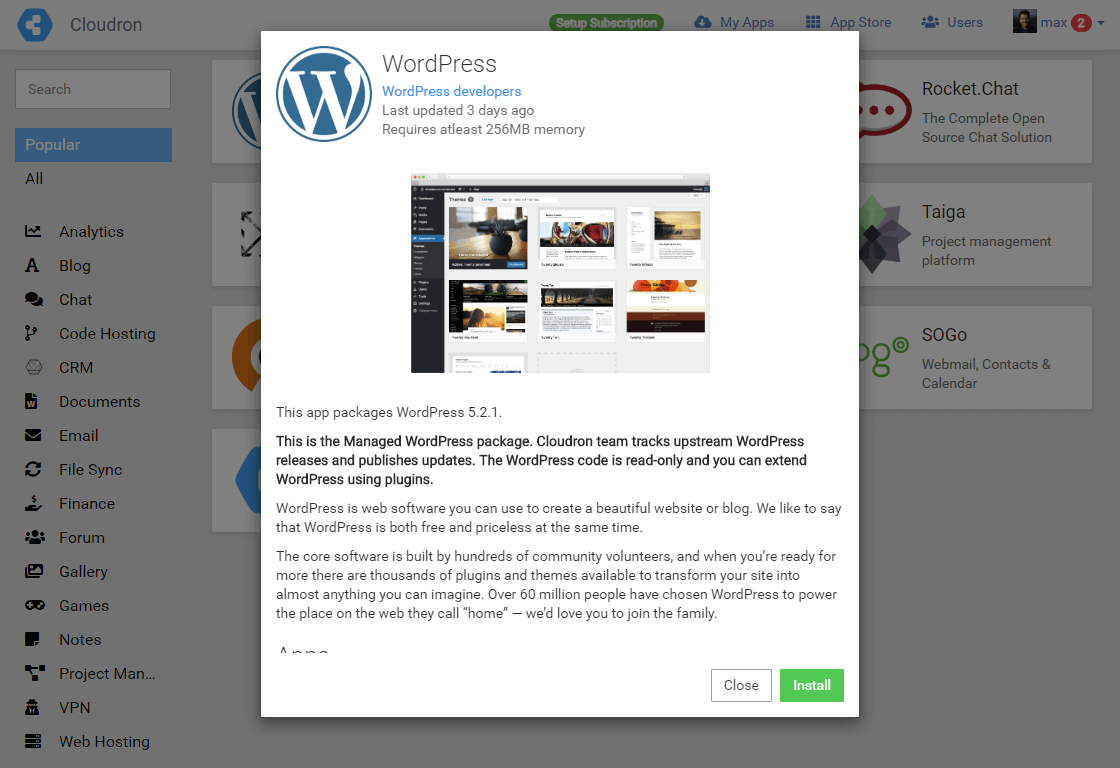
We will be installing WordPress to test the platform.
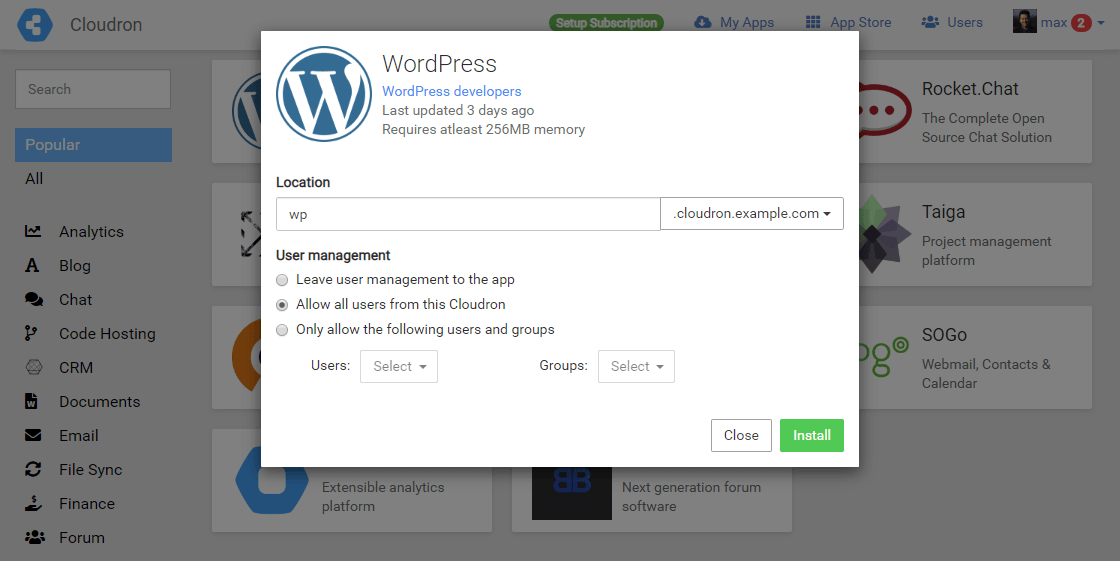
Make the necessary configurations to install WordPress. Enter a subdomain or leave the field empty to install it on the primary domain. Then select the users you want to be able to access the WP app. Once these are set, click the Install button to continue.
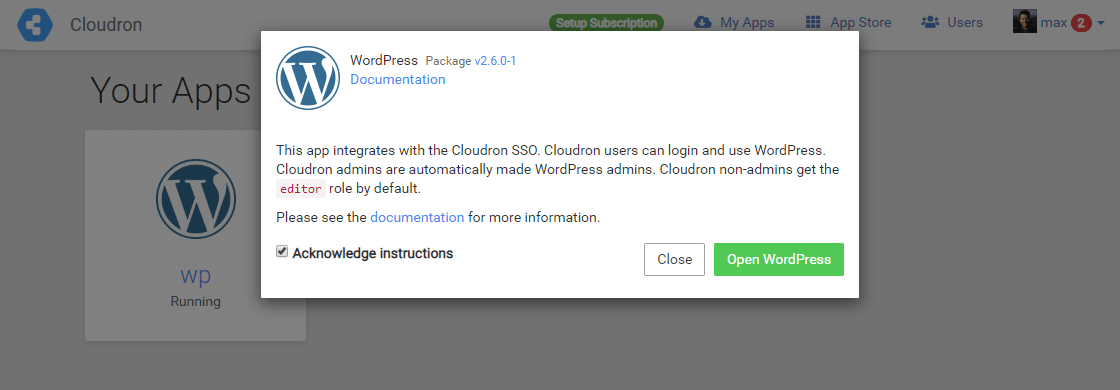
Cloudron will automatically configure user accounts on the WordPress site. Confirm that you’ve read the instructions and click the Open WordPress button.
Check that WordPress is working by going to the default landing page at the subdomain you chose.
Reference⚓
https://blog.servercheap.net/tutorials/debian-ubutnu/get-started-with-cloudron/